1. Navigate to the ‘Generate Codes Tab’ and you will be within the ‘Configure’ stage of the generation process
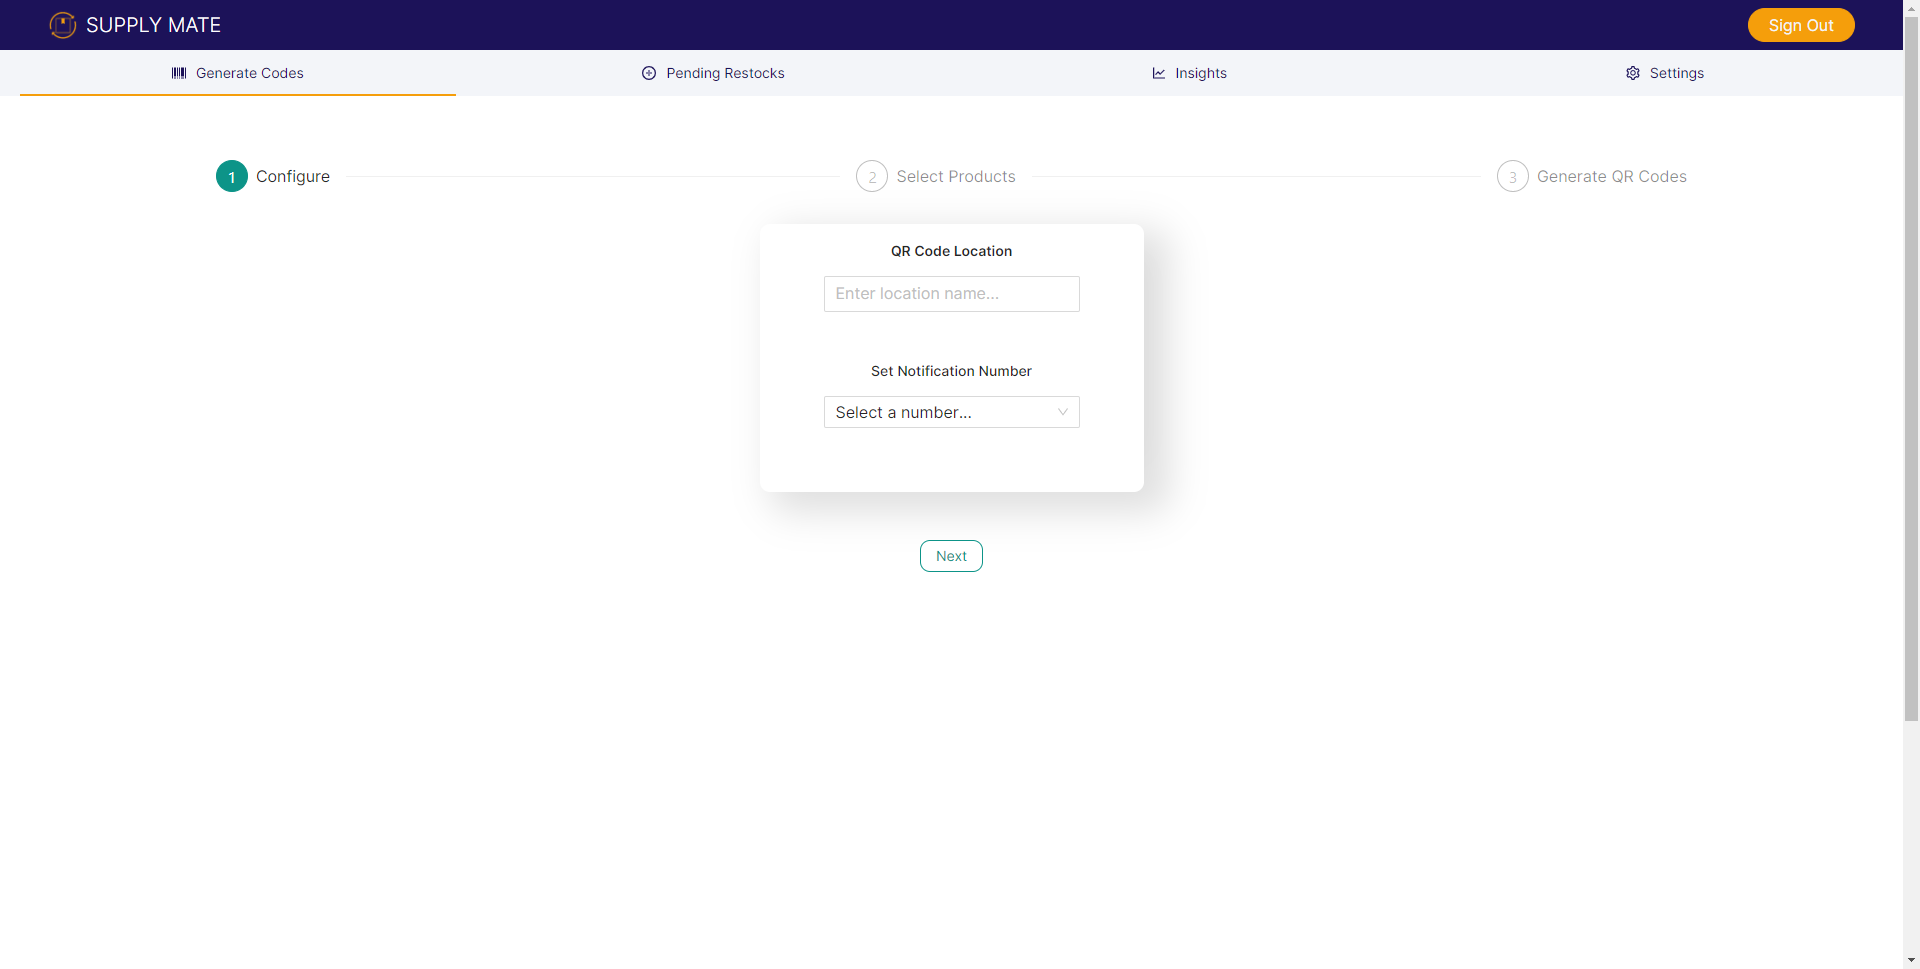
2. Enter the Location name where the codes will be placed. This name might be 123 Main St. or Johns Autobody Shop

3. Select your ‘Notification Number’ from the drop down. This number is the number which you would like to receive notifications that a request has been made. If you pay for any tier which allows for SMS communication from a person scanning your QR Code, this number is who that person can text. Note: These numbers are added in ‘Settings’ under ‘Add Contact’ and can be viewed under ‘Contact List’.
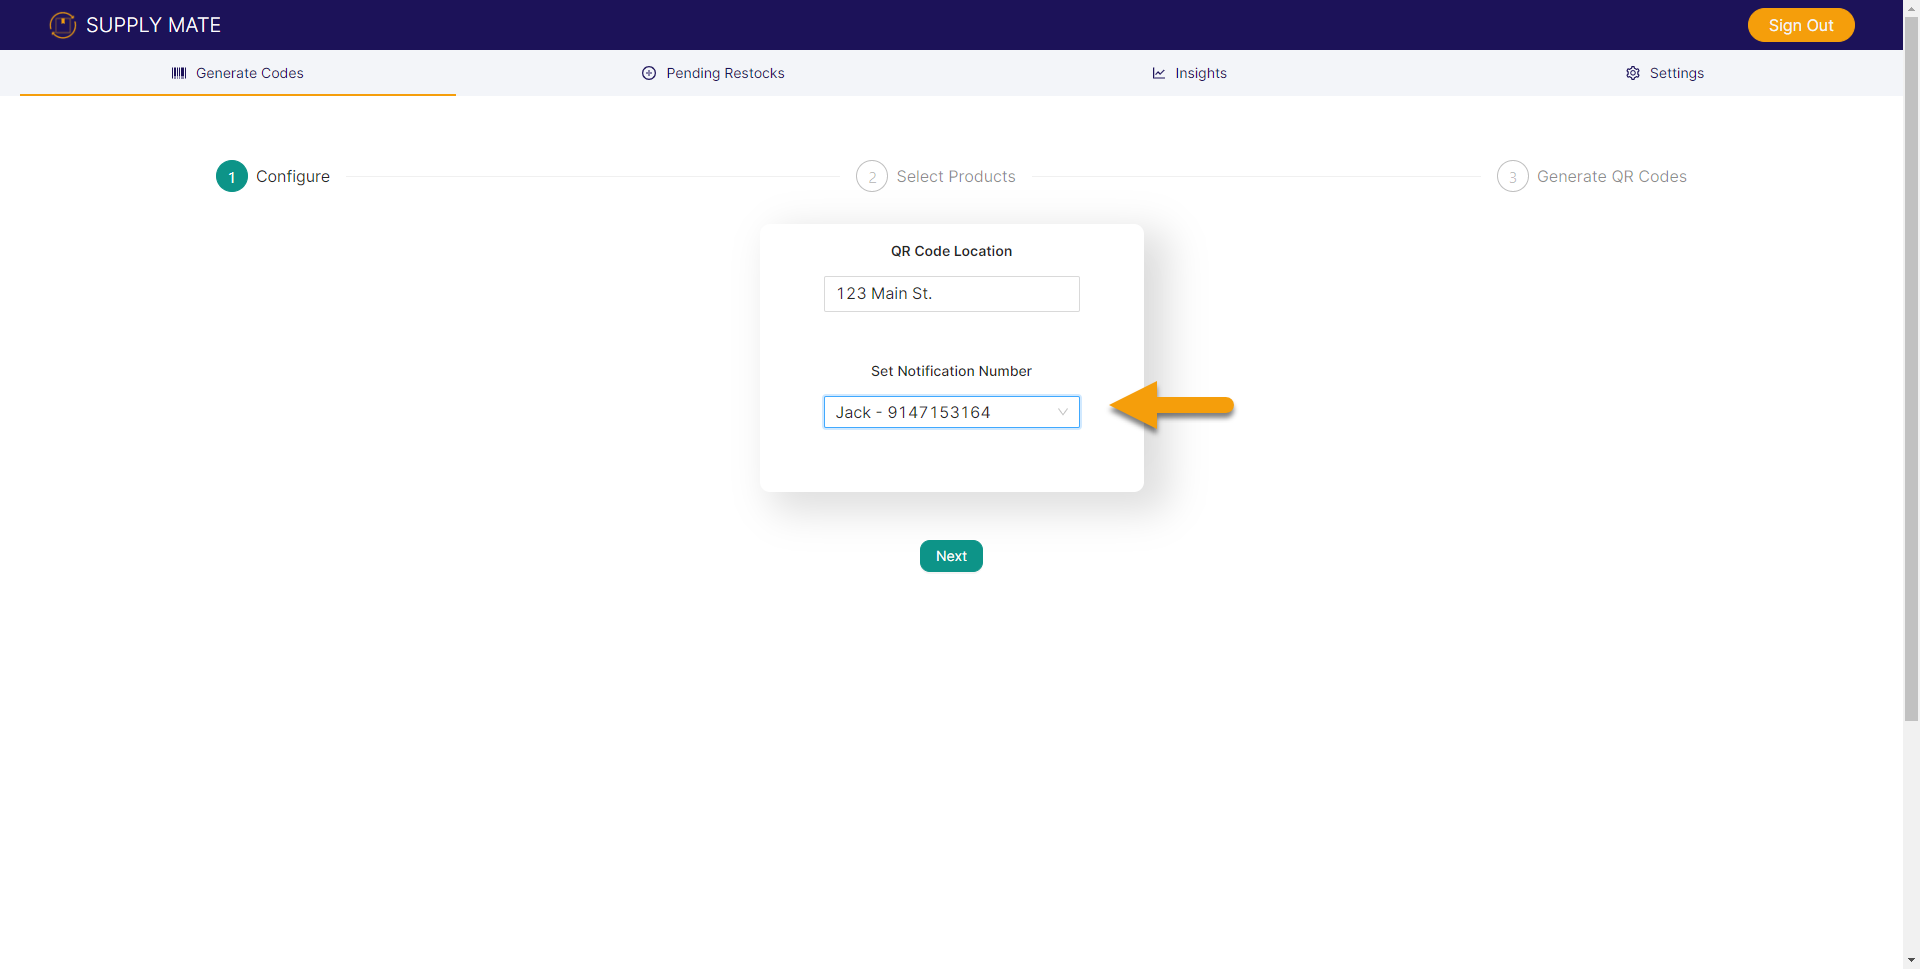
4. Once you have entered the ‘Location name’ and assigned a ‘Notification Number’, click ‘Next’
5. You can now select the products you want linked to that location. These will each be their own QR Code that can be placed at your desired location and allow you to track what product is requested at which location specified in the previous step.
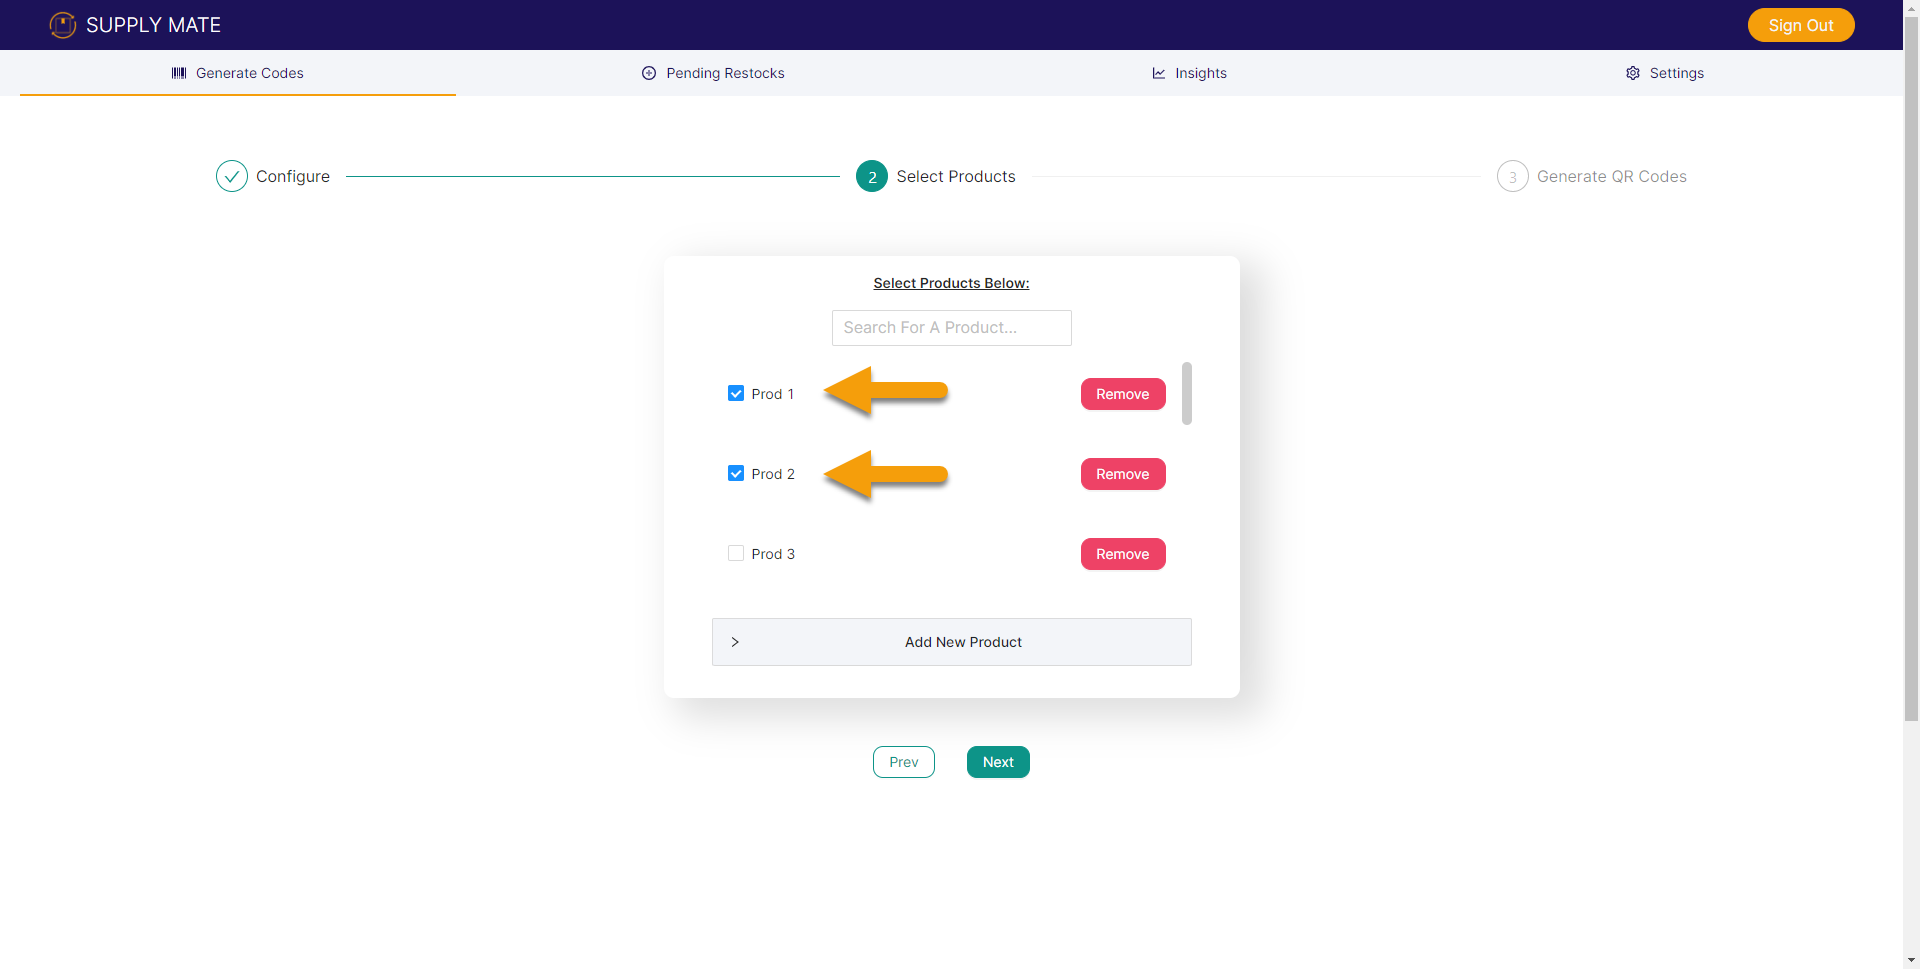
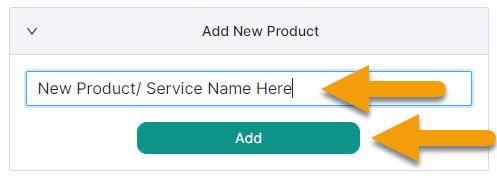
6. To add a new product to your list of available inventory open up the ‘Add New Product’ accordion.
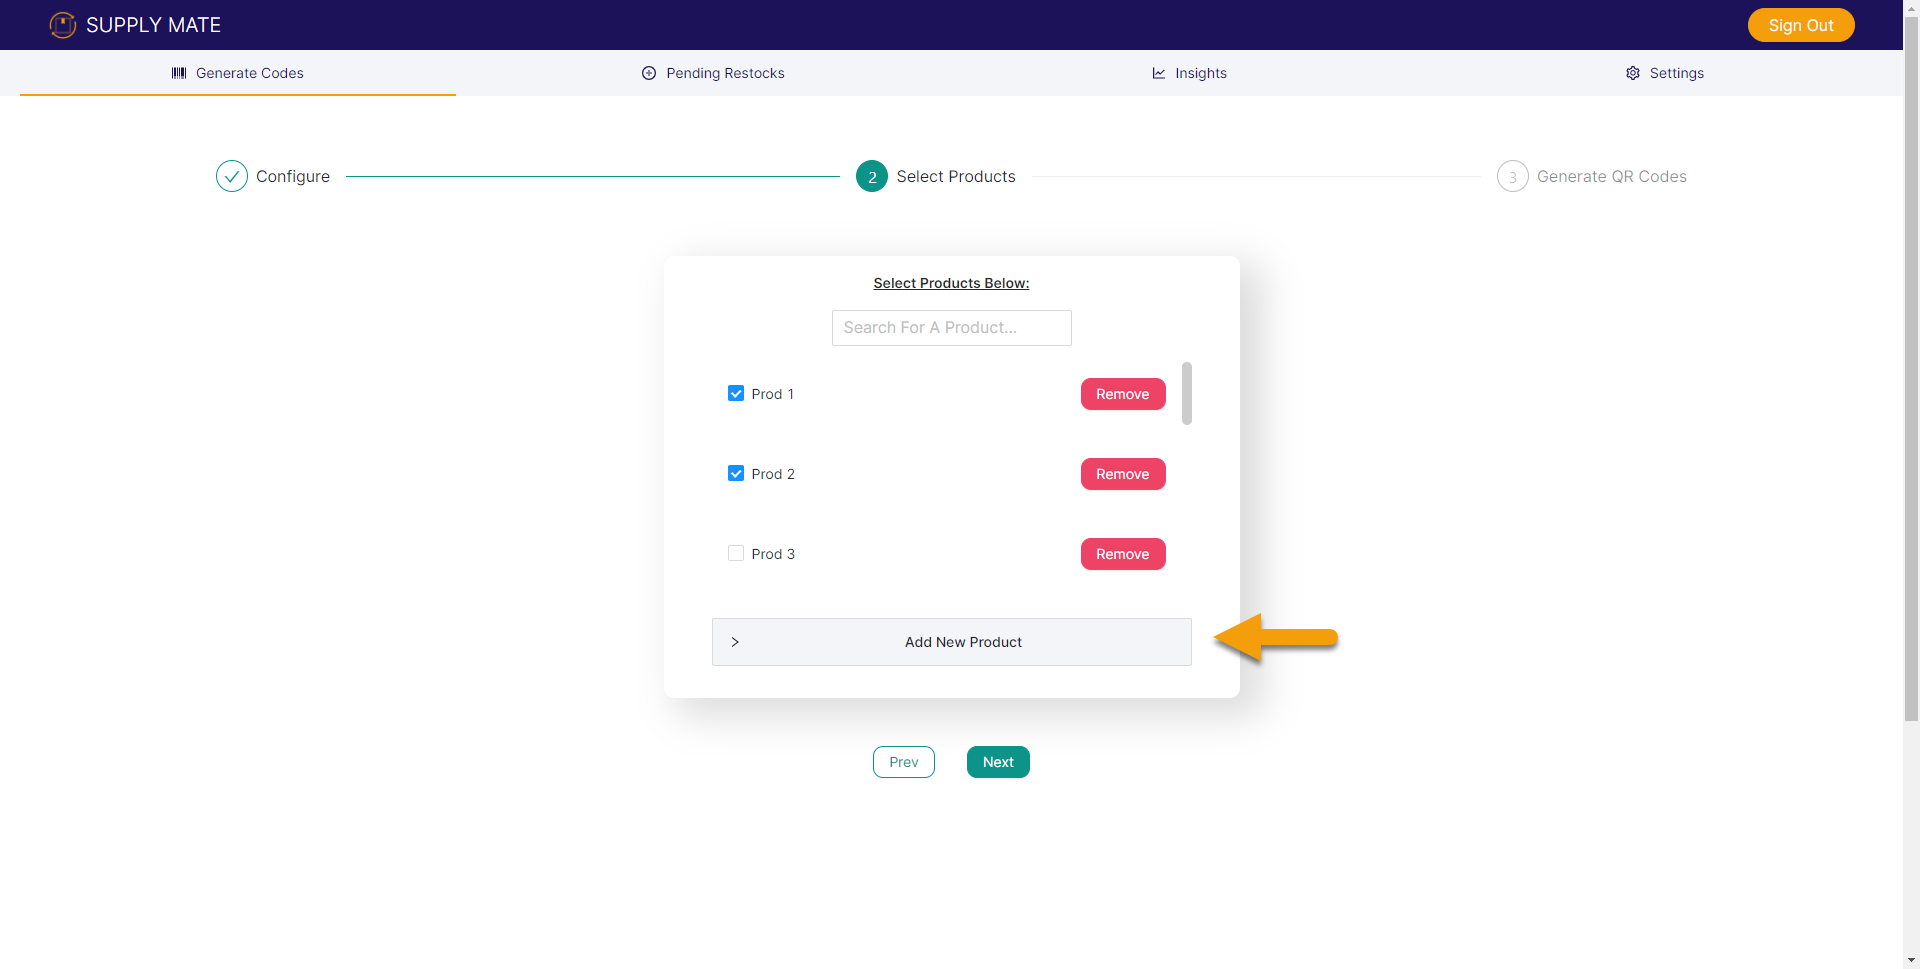
7. Specify the product name. In this example we used ‘New Product to Add’ then click ‘Add’
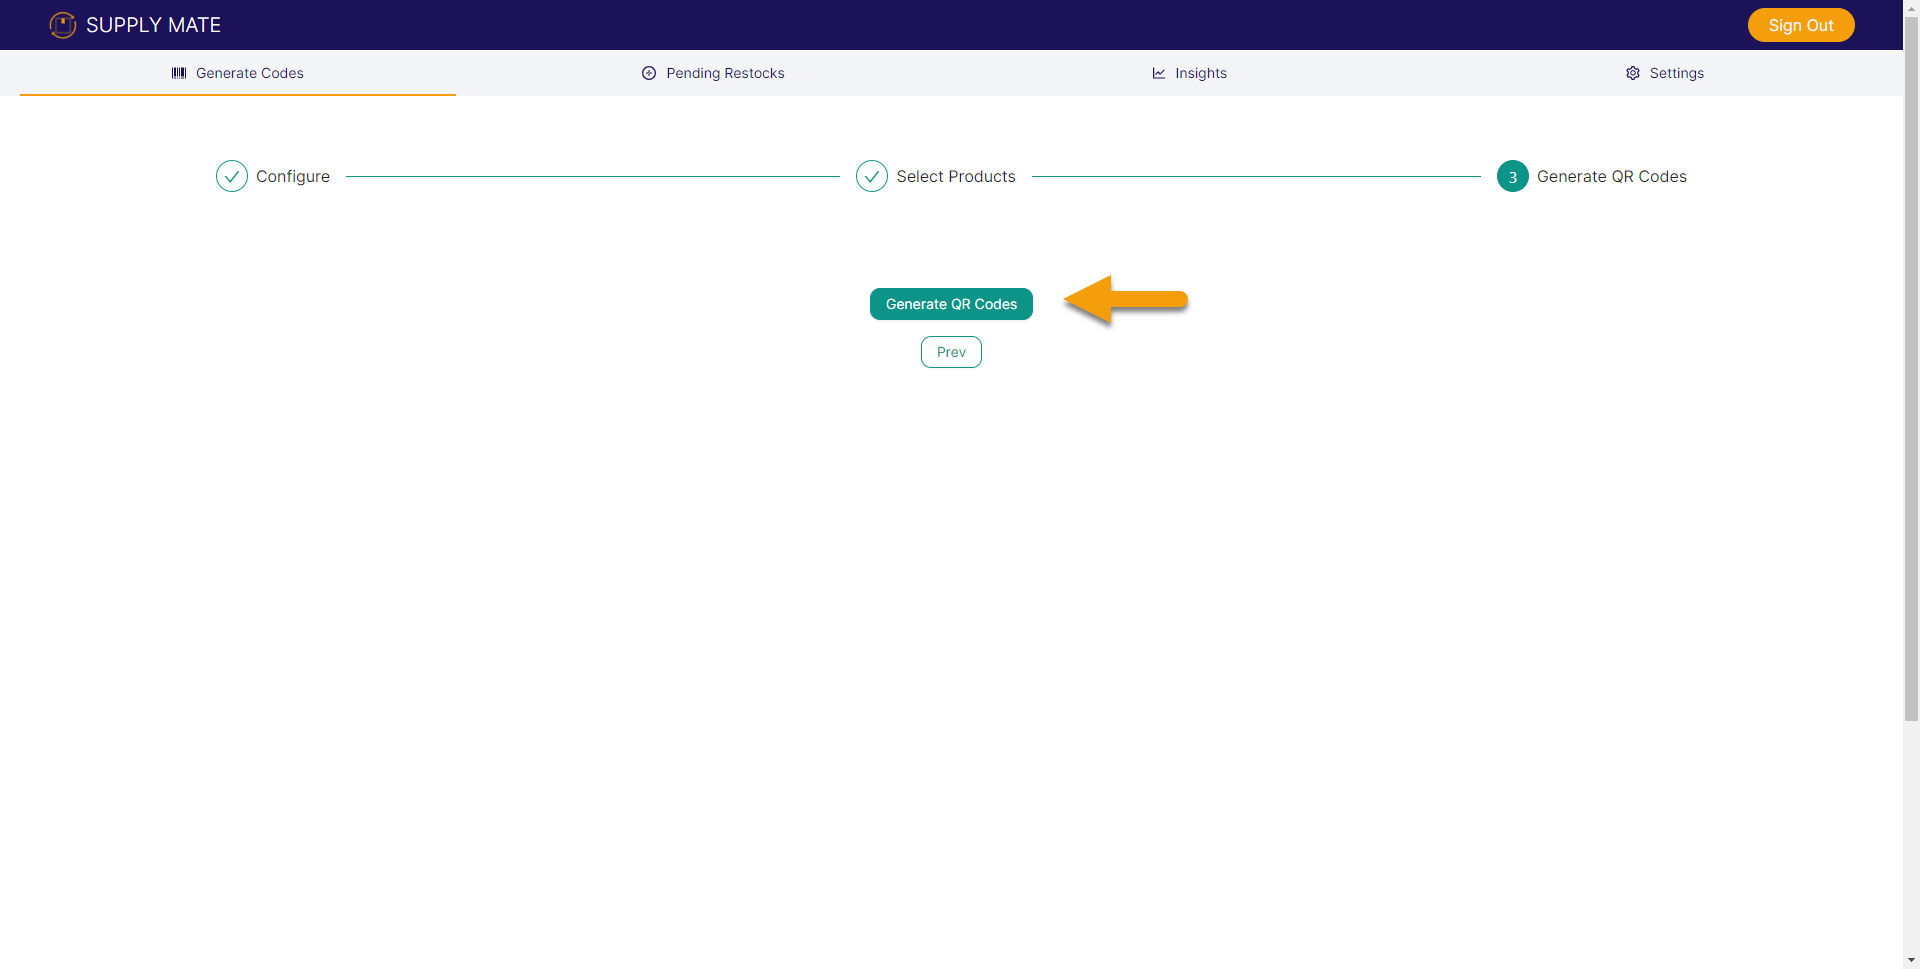
8. Now the magic. Click ‘Generate’ to generate the QR Codes that can allow users to scan a code and request a specific product for a specific location.
9. You can now preview your generated codes and ‘Confirm and Download’. These will download to your device and be emailed to the email used to log in the Supply Mate.
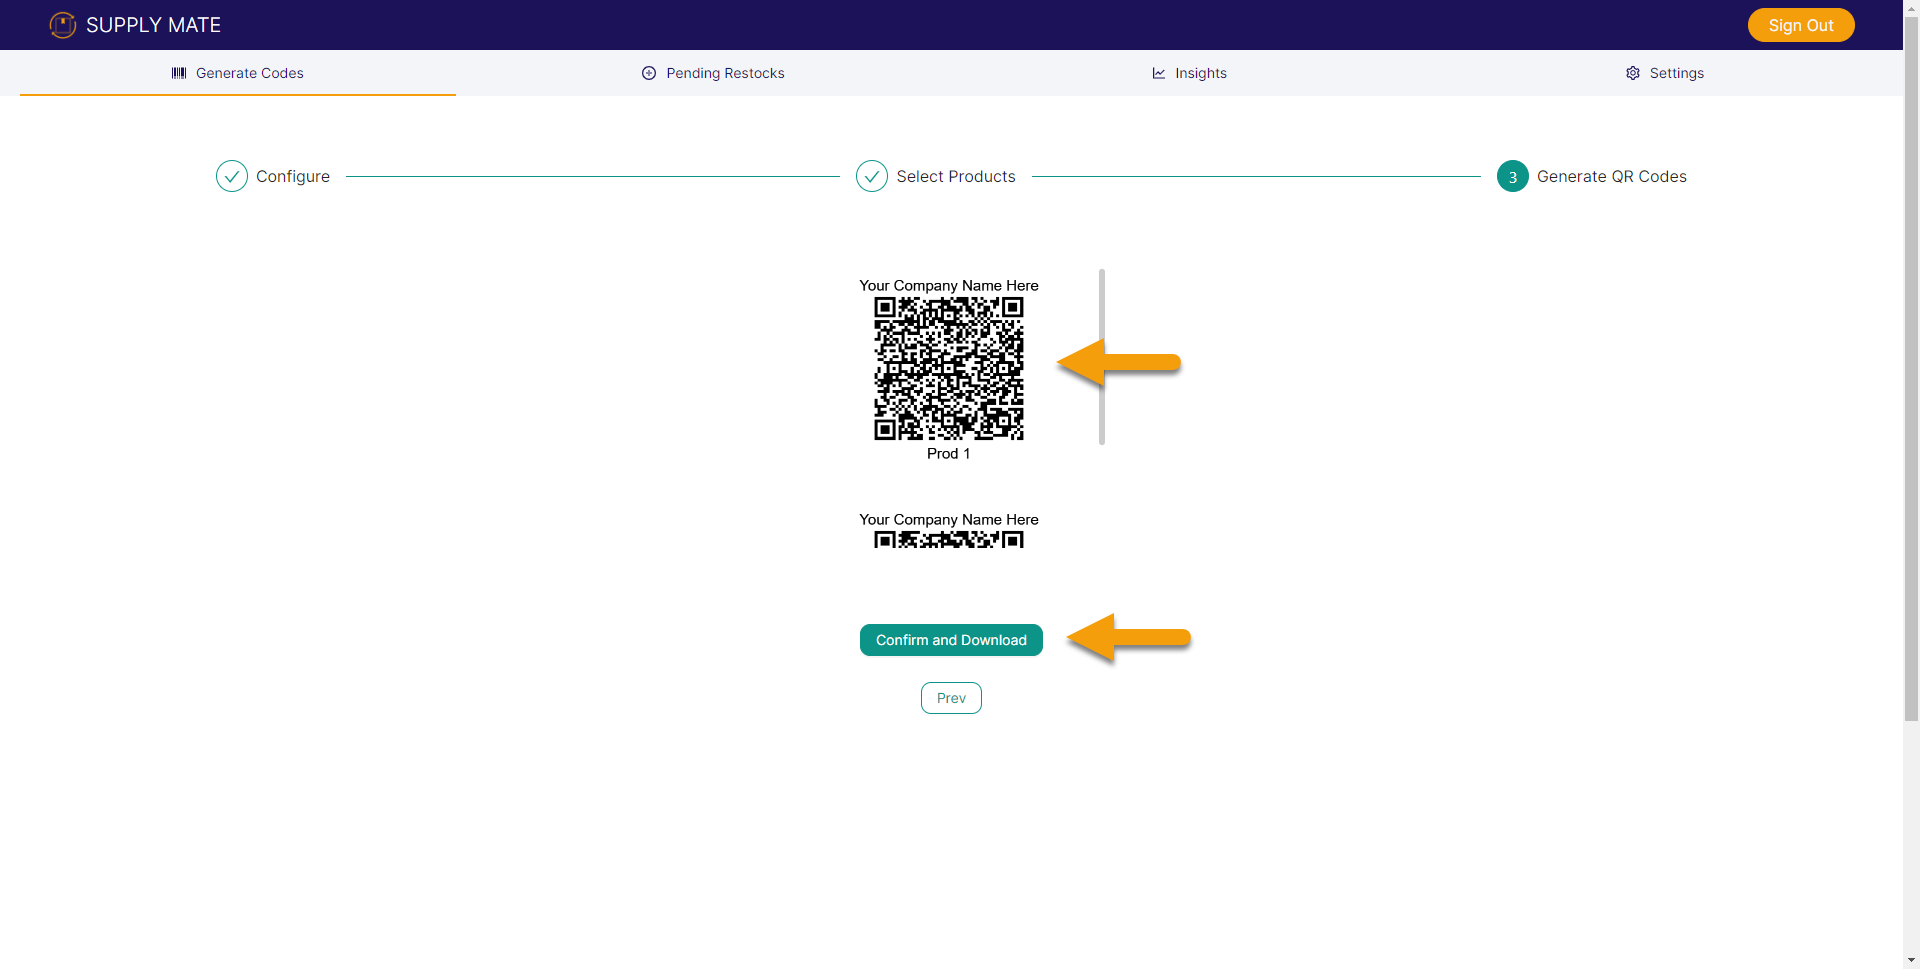
There are 3 main parts to the visual QR Code. The top of the QR Code will display your company name, the QR Code itself which connects the products and locations to easily scan and request, and the Product Name itself.
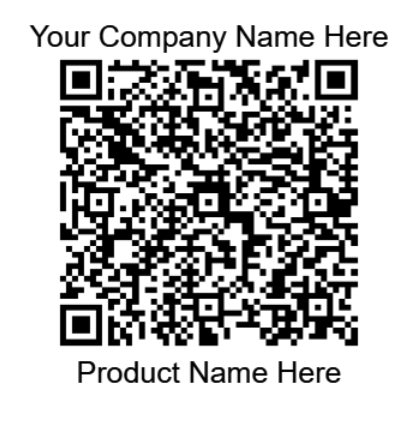
Above the QR Code’ is your business name which was inputted during the account creation stage and managed in ‘Settings’
The QR Code itself is composed of the attributes you specified in the ‘Configure’ and ‘Select Products’ stage of the code generation steps.
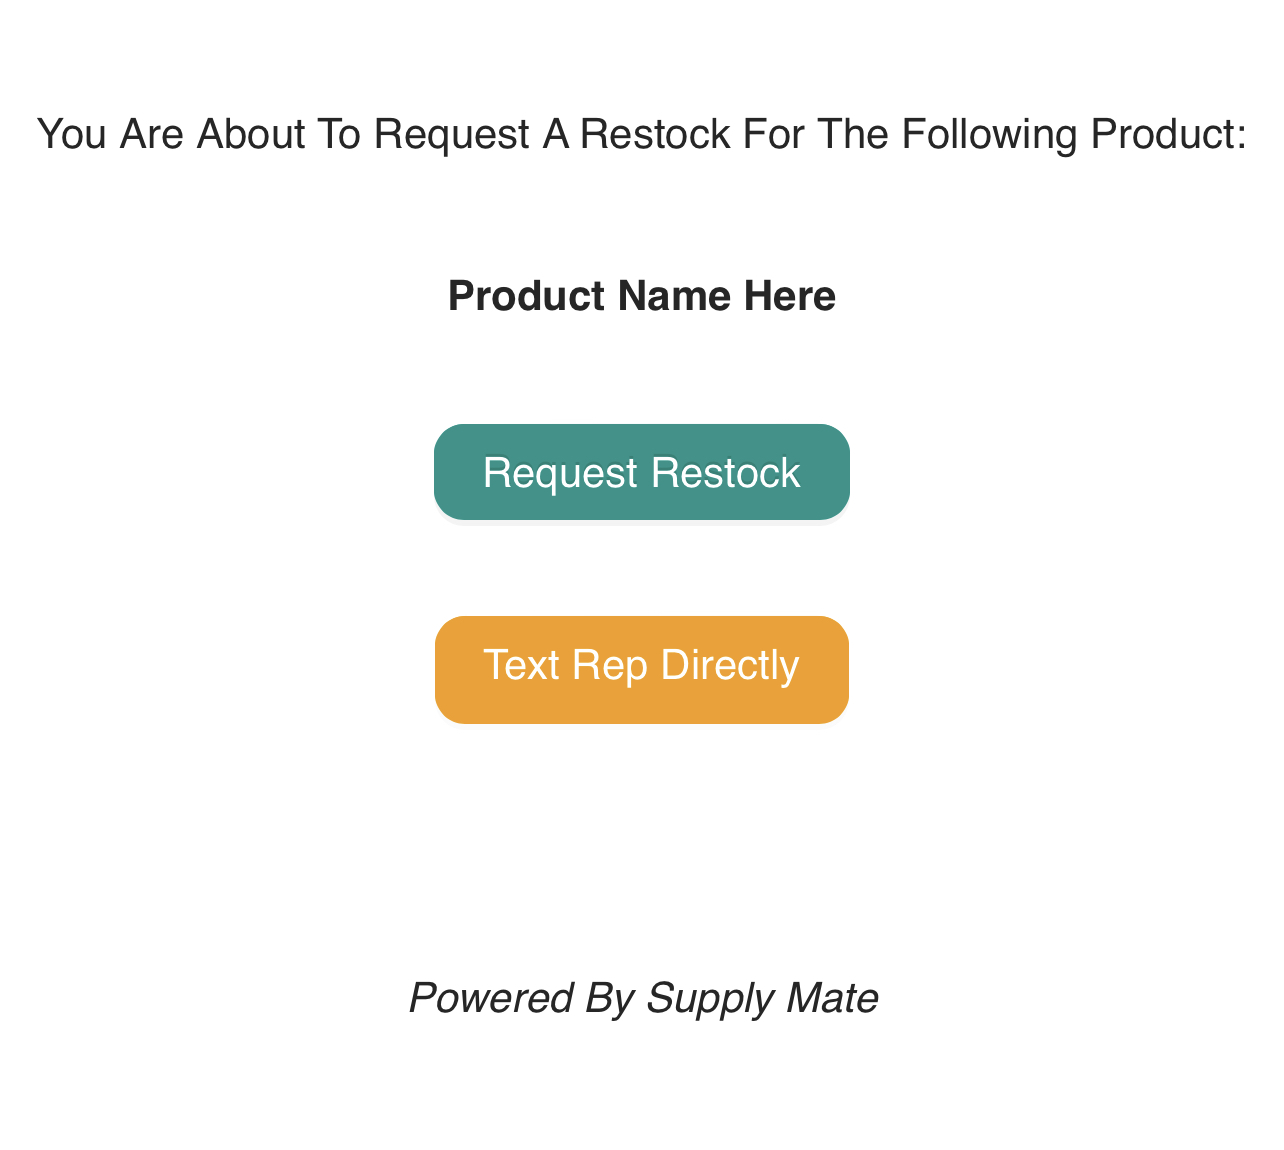
Product name will be displayed below each QR Code. This allows you and the user to quickly know what product would be requested with each scan. This name will also appear on the Request page following scanning a code.
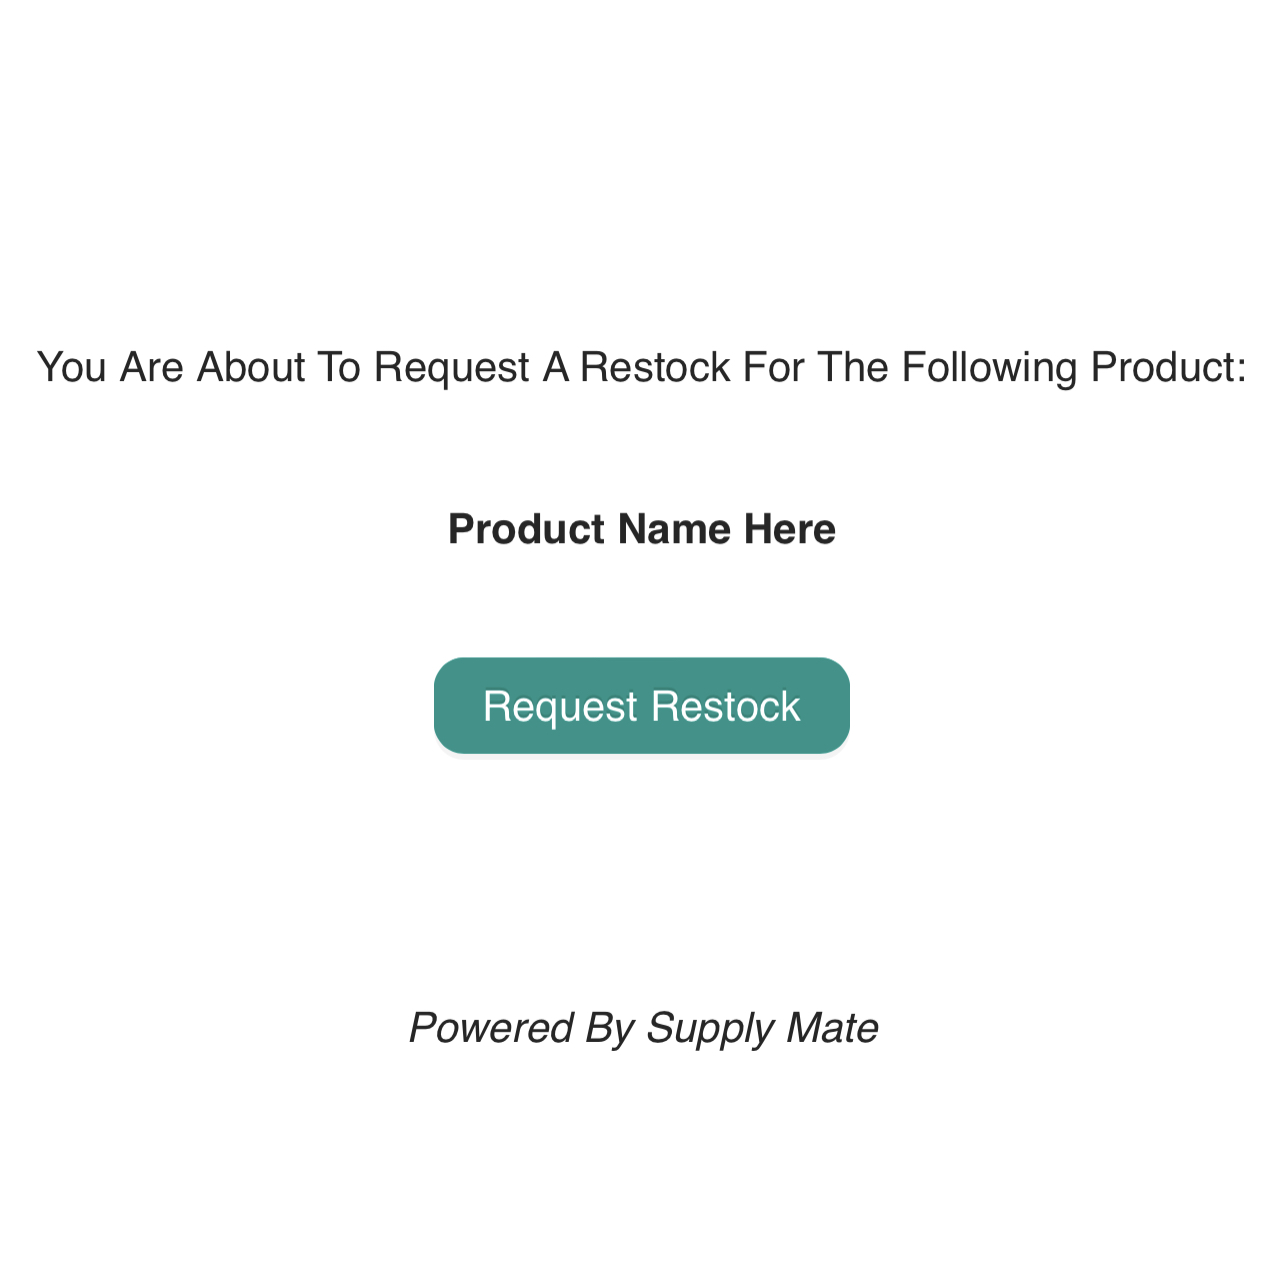
1. When a user scans the QR Code installed at your desired location they will be brought to simple request page.
2. The request page will allow the user to ‘Request Restock’ and/or ‘Send a Text’ (available in higher tier plans).
3. When a user clicks ‘Request Restock’ they will be met with a brief confirmation message ‘Request Sent Successfully. You May Close This Page’
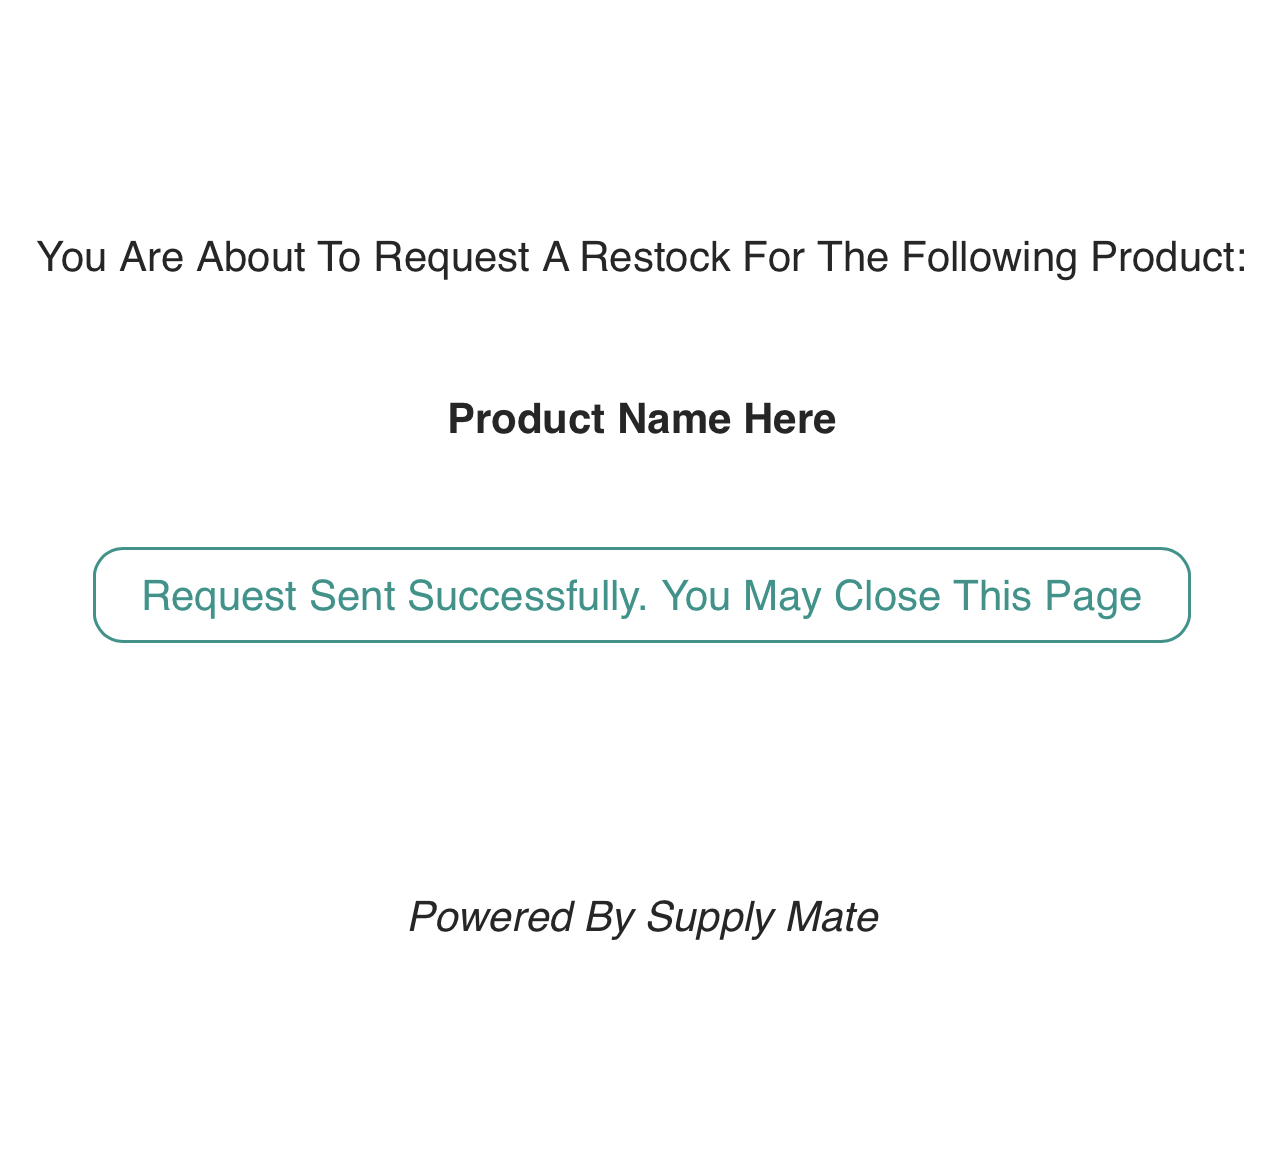
4. After the ‘Request Sent’ message, your ‘Pending’ table under the ‘Pending Restock’ tab will reflect the new request.
4a. If a user selects ‘Request’ then your ‘Pending Restocks’ table will be populated with that record
4b. If you have a higher tier where SMS communication is available, the user can text the designated number you assigned to that QR Code in the ‘Configure’ step with a pre-composed message containing the requested products name and the location where it is installed. All the user needs to do is press Send.
You as a business owner, Administrator, or employee generate product request QR Codes linked to specific locations
The codes you generated can be downloaded and printed on paper or from a sticker printer to then be placed at the location of your choosing. Depending on your business these might be placed under each product on a shelf or printed on one master sheet located in a closet or draw.
A user scans the code for the specified product they want
The scanning user will be instantly brought to a request page
The scanning user will be able to click ‘Request Restock’ or ‘Text Request’. Higher tier plans allow for direct SMS communication whereas all plans allow a scanning user to click ‘Request Restock’
Upon a user clicking ‘Request’ that request will instantly be available in your ‘Pending Restock’ tab under ‘Pending’
When you have ordered or delivered the product you can click ‘Yes’ under the fulfilled column. This will move that request to the ‘Completed’ table.
Navigate to ‘Settings’ tab
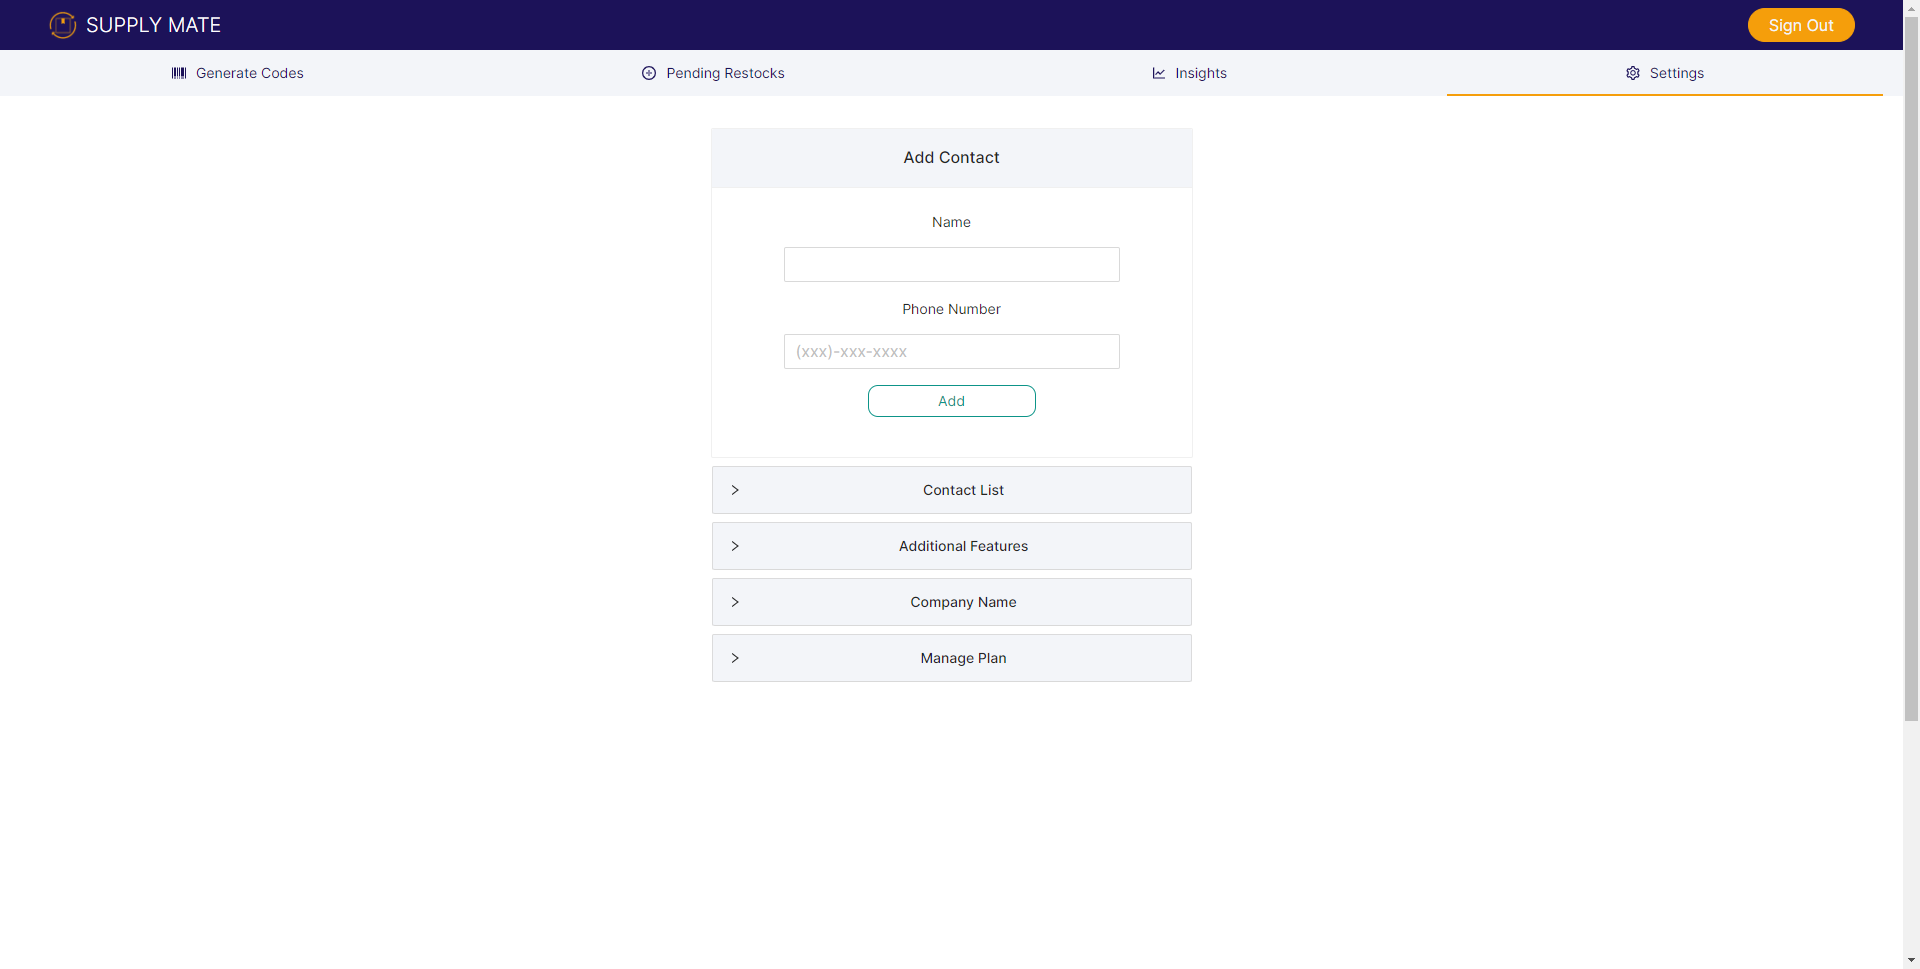
Start entering the name of the new contact who you want to receive notifications for designated locations
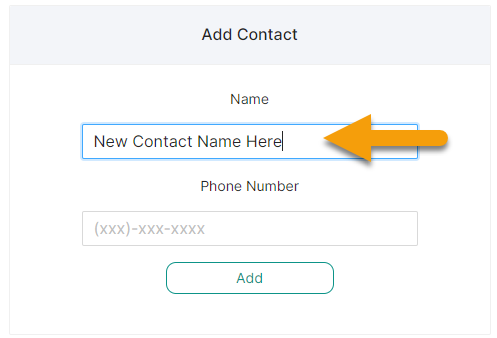
Add phone number in xxx-xxx-xxxx format (no dashes required)

Click ‘Add’ and the new contact will be added and viewed under ‘Contact List’ in ‘Settings’
QR Codes are tied to a particular contact when they're generated.
If you delete a contact, you will need to regenerate new codes for those products with an existing contact.
You will still receive Pending restock requests in your portal, but the contact will no longer receive restock notifications on their mobile phone.
At the moment, you cannot update the contact a QR Code is tied to once it has been generated.
You will need to generate a new code with the desired contact. However, we are looking into this as a feature in the future.
If you have a higher tier plan which enables your scanners to send an SMS to the designated contact you assigned in the code generation step you can toggle those functions on or off.
Navigate to ‘Settings’ tab
Expand ‘Additional Features’
Select ‘Yes’ to allow SMS communication to point of contact or ‘No’ if you only want the scanning user to have a ‘Request’ button.
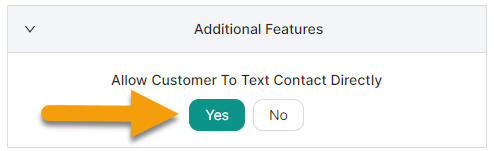
If you selected ‘Yes’, you will see an additional button on the request page with the label ‘Text Rep Directly’